I have had this old door for a while with the intent of making it into a headboard for the bed in our guest room. At first I wasn’t exactly sure how to make it work since it was about 17″ longer than a queen size bed so I stuck it in the garage for the winter until I could think of how to make it the right size.

This month I decided it was time to move on with this project.
I had already painted the guest room, as well as an armoire that used to hold our TV for years and a little end table, bought a new bed and bedding. So it was time to drag out the door for its makeover.
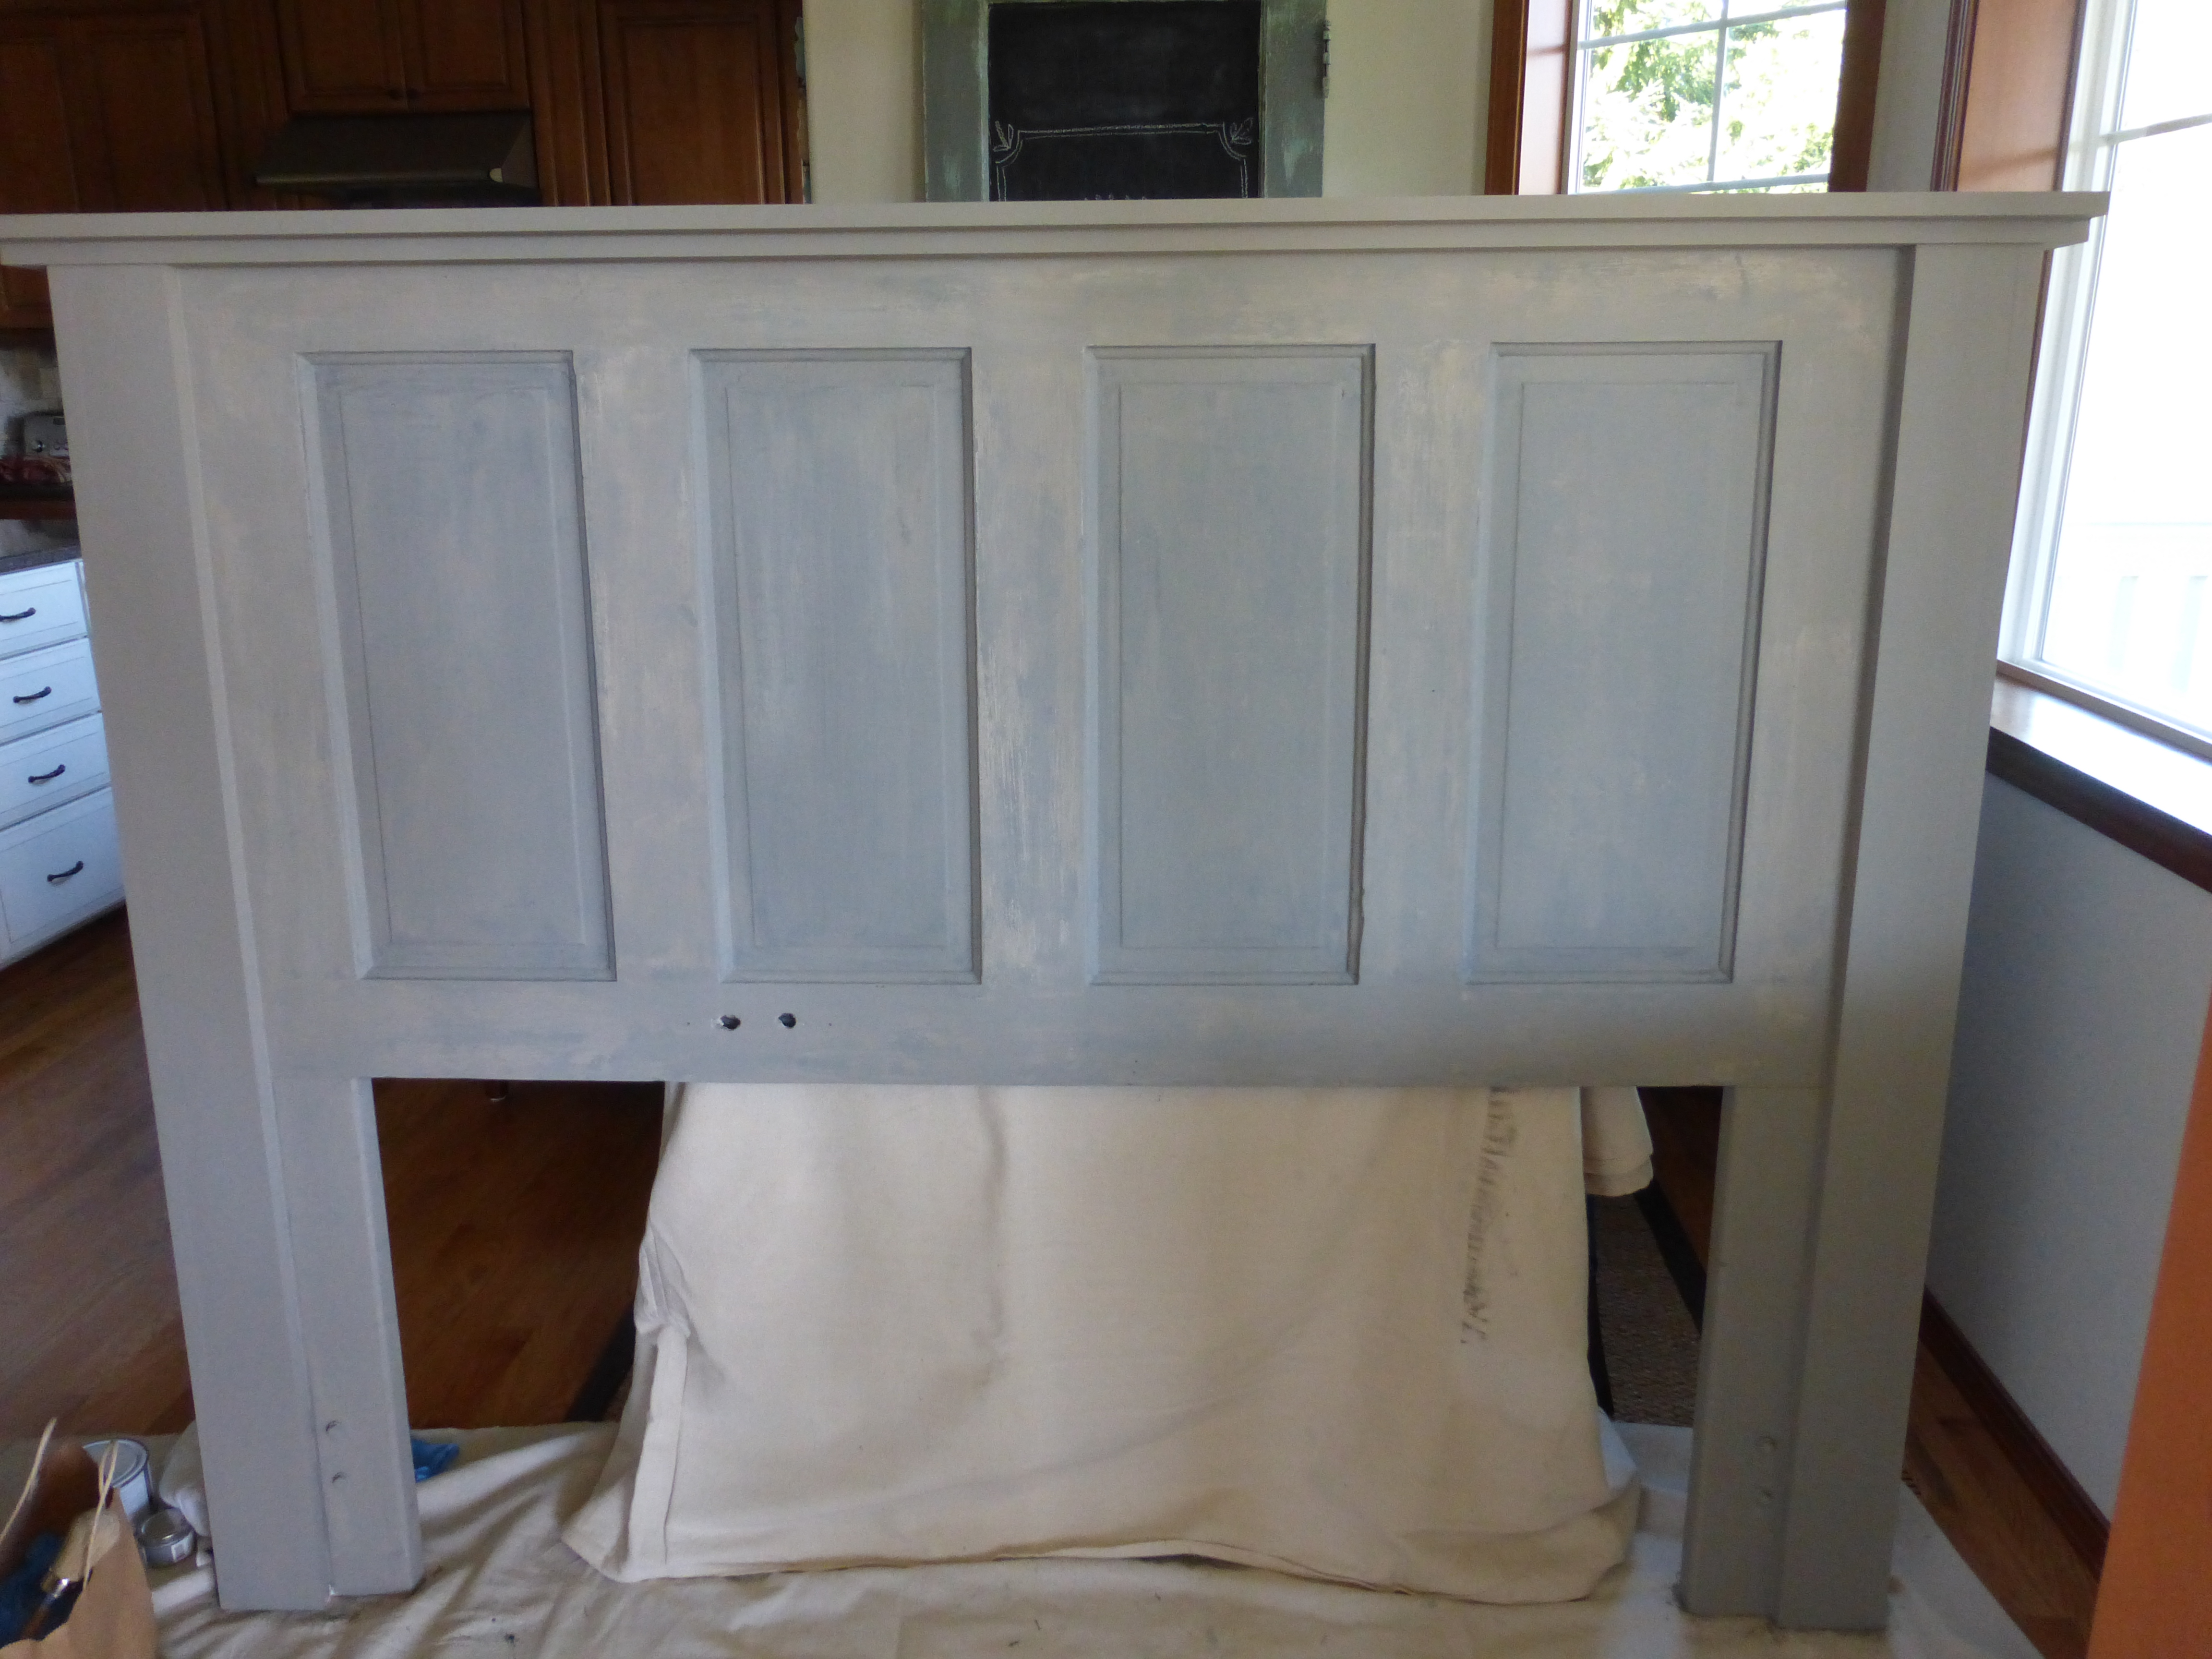
My handy husband insisted on helping me, thank goodness, that door was heavy and I couldn’t manage it on my own. We decided, after measuring and drawing up a plan, that if we cut off one of the panels the bed would be 60″ just the right width for a queen size bed after we added the side supports to make it 70″ when finished.
We sanded the brown paint off the door a bit just to see what it would look like. Fun but the room was being decorated in mostly a gray and cream color scheme so I planned to paint it when it was assembled.

Then we needed to add side pieces that would finish the ends and be used to stand the headboard up and bolt to the bedframe. We used two 2×4’s and faced them with a 1×4, and a 1×3 on each side of the door. We determined the height of the door above the bed and cut the end post to that height. I went with 54″ from the floor to the top of the door allowing an additional 1 1/2″ for the header piece.

I was going for a simpler look to finish the top of the headboard so we opted for 2 pieces of wood that would be the top, one 1×4 and 1×3 to give the look I wanted.

All pieces were wood glue and nailed together. We also used some metal mending plates to attach the 2×4’s to the door.

Today I started painting it with Annie Sloan Chalk Paint, French Linen color. Love that paint ! No priming and you have such freedom of creativity with it. I was going to use one of the homemade chalk paint recipes I saw on Pinterest to save a little money, but I loved this color and so for this project I stuck with the ‘good stuff’.
After I had given it a light coat I started liking the worn distressed finish I was seeing. I had planned on painting it with a couple of coats to hide the previous color and imperfections. I pooled the opinion of my daughters and a friend and they all liked the pictures I sent them of the finish I was getting with one coat. So I decided, for now at least to embrace the imperfections and uniqueness of the piece and live with it for awhile. What do you think? More paint coats or leave it as is?


I am still planning on waxing it tomorrow and considering adding some dark wax to the creases as well. Not sure yet as the more I look at it the more I like it just the way it is.
Here is my supply list:
vintage door( or you could use new one)
2 2×4’s ( as straight as you can find)
3 1×3’s(clear pine finish boards)
3 1×4’s( also pine boards)
*wood glue, nails and metal mending brackets( I think you could use additional wood strips to join the 2×4’s but we opted for this)
*Chalk Paint and Wax
It was fun to make and I’ll post a picture of it again when it is attached to the bedframe. The finished guest room will be posted when it all comes together. It’s almost there!
Thanks for stopping by,
Linda